> ## Documentation Index
> Fetch the complete documentation index at: https://radarlabs-rob-onesignal-api-migration.mintlify.site/llms.txt
> Use this file to discover all available pages before exploring further.
# iOS SDK
The Radar SDK abstracts away cross-platform differences between location services, allowing you to add geofencing, location tracking, trip tracking, geocoding, and search to your apps with just a few lines of code.
Learn how to integrate the iOS SDK below. You can also see the [source](https://github.com/radarlabs/radar-sdk-ios) and a [detailed SDK reference](https://radarlabs.github.io/radar-sdk-ios/Classes/Radar.html) on GitHub.
## Install SDK
The best way to install the SDK is via [CocoaPods](https://cocoapods.org/) or [Carthage](https://github.com/Carthage/Carthage).
For details on the latest SDK releases, see the [**releases page**](https://github.com/radarlabs/radar-sdk-ios/releases) on GitHub. You can also star ⭐️ and watch 👀 the repo.
The SDK is small and typically adds less than 500 KB to your compiled app.
### CocoaPods
Install [CocoaPods](https://cocoapods.org/). If you don't have an existing `Podfile`, run `pod init` in your project directory. Add the following to your `Podfile`:
```
pod 'RadarSDK', '~> 3.26.0'
```
Then, run `pod install`. You may also need to run `pod repo update`.
After installing, use the `.xcworkspace` file to open your project in Xcode instead of the `.xcproject` file.
### Swift Package Manager
In Xcode, go to *File* > *Swift Packages* > *Add Package Dependency*. Enter `https://github.com/radarlabs/radar-sdk-ios-spm.git` for the *Package Repository URL*. This URL points to our [SPM optimized repo](https://github.com/radarlabs/radar-sdk-ios-spm), which has a smaller binary size to facilitate faster build times.
**Note:** we recommend pinning the minor version you're installing as we occasionally introduce breaking changes in new minor versions. You can pin the minor version using the range operator:
```
3.26.0..<3.27.0
```
Only select `RadarSDK` unless you are also intending to use the location metadata feature. Refer to [**this section**](#location-metadata) for more information.
### Carthage
Install [Carthage](https://github.com/Carthage/Carthage) by adding the following to your `Cartfile`:
```
github "radarlabs/radar-sdk-ios" ~> 3.21.5
```
Then, run `carthage update` and drag `Build/iOS/RadarSDK.framework` into the *Linked Frameworks and Libraries* section of your target. Do not add the framework as an input to your `copy-frameworks` run script.
### Add manually
You can also add the SDK to your project manually. Download [the current release](https://github.com/radarlabs/radar-sdk-ios/releases), unzip the package, and drag `RadarSDK.xcframework` into your Xcode project. It will automatically appear in the *Frameworks, Libraries, and Embedded Content* section of your target settings. Switch *Do Not Embed* to *Embed & Sign*.
## Dependencies
The SDK depends on Apple's `CoreLocation` framework. In your target settings, go to *General* > *Frameworks, Libraries, and Embedded Content* and add `CoreLocation` if you haven't already.
The SDK currently supports iOS 10 and higher.
## Initialize SDK
When your app starts, initialize the SDK with your publishable API key, found on the [Settings page](https://dashboard.radar.com/settings).
Use your `Test Publishable` key for testing and non-production environments. Use your `Live Publishable` key for production environments.
Note that you should always use your publishable API keys, which are restricted in scope, in the SDK. Do not use your secret API keys, which are unrestricted in scope, in any client-side code.
```swift Swift theme={null}
import UIKit
import RadarSDK
@UIApplicationMain
class AppDelegate: UIResponder, UIApplicationDelegate {
func application(_ application: UIApplication, didFinishLaunchingWithOptions launchOptions: [UIApplication.LaunchOptionsKey: Any]?) -> Bool {
Radar.initialize(publishableKey: "prj_test_pk_...")
return true
}
}
```
```c Objective-C theme={null}
#import "AppDelegate.h"
@import RadarSDK;
@implementation AppDelegate
- (BOOL)application:(UIApplication *)application didFinishLaunchingWithOptions:(NSDictionary *)launchOptions {
[Radar initializeWithPublishableKey:@"prj_test_pk_..."];
return YES;
}
@end
```
## Request permissions
Radar respects [standard iOS location permissions](https://developer.apple.com/documentation/corelocation/requesting_authorization_for_location_services).
For foreground tracking or trip tracking with continuous mode, the app's location authorization status must be `kCLAuthorizationStatusAuthorizedWhenInUse` or`kCLAuthorizationStatusAuthorizedAlways`. For background tracking or geofencing with responsive mode, the app's location authorization status must be `kCLAuthorizationStatusAuthorizedAlways`.
If your app already requests the necessary location permissions, you can skip this step.
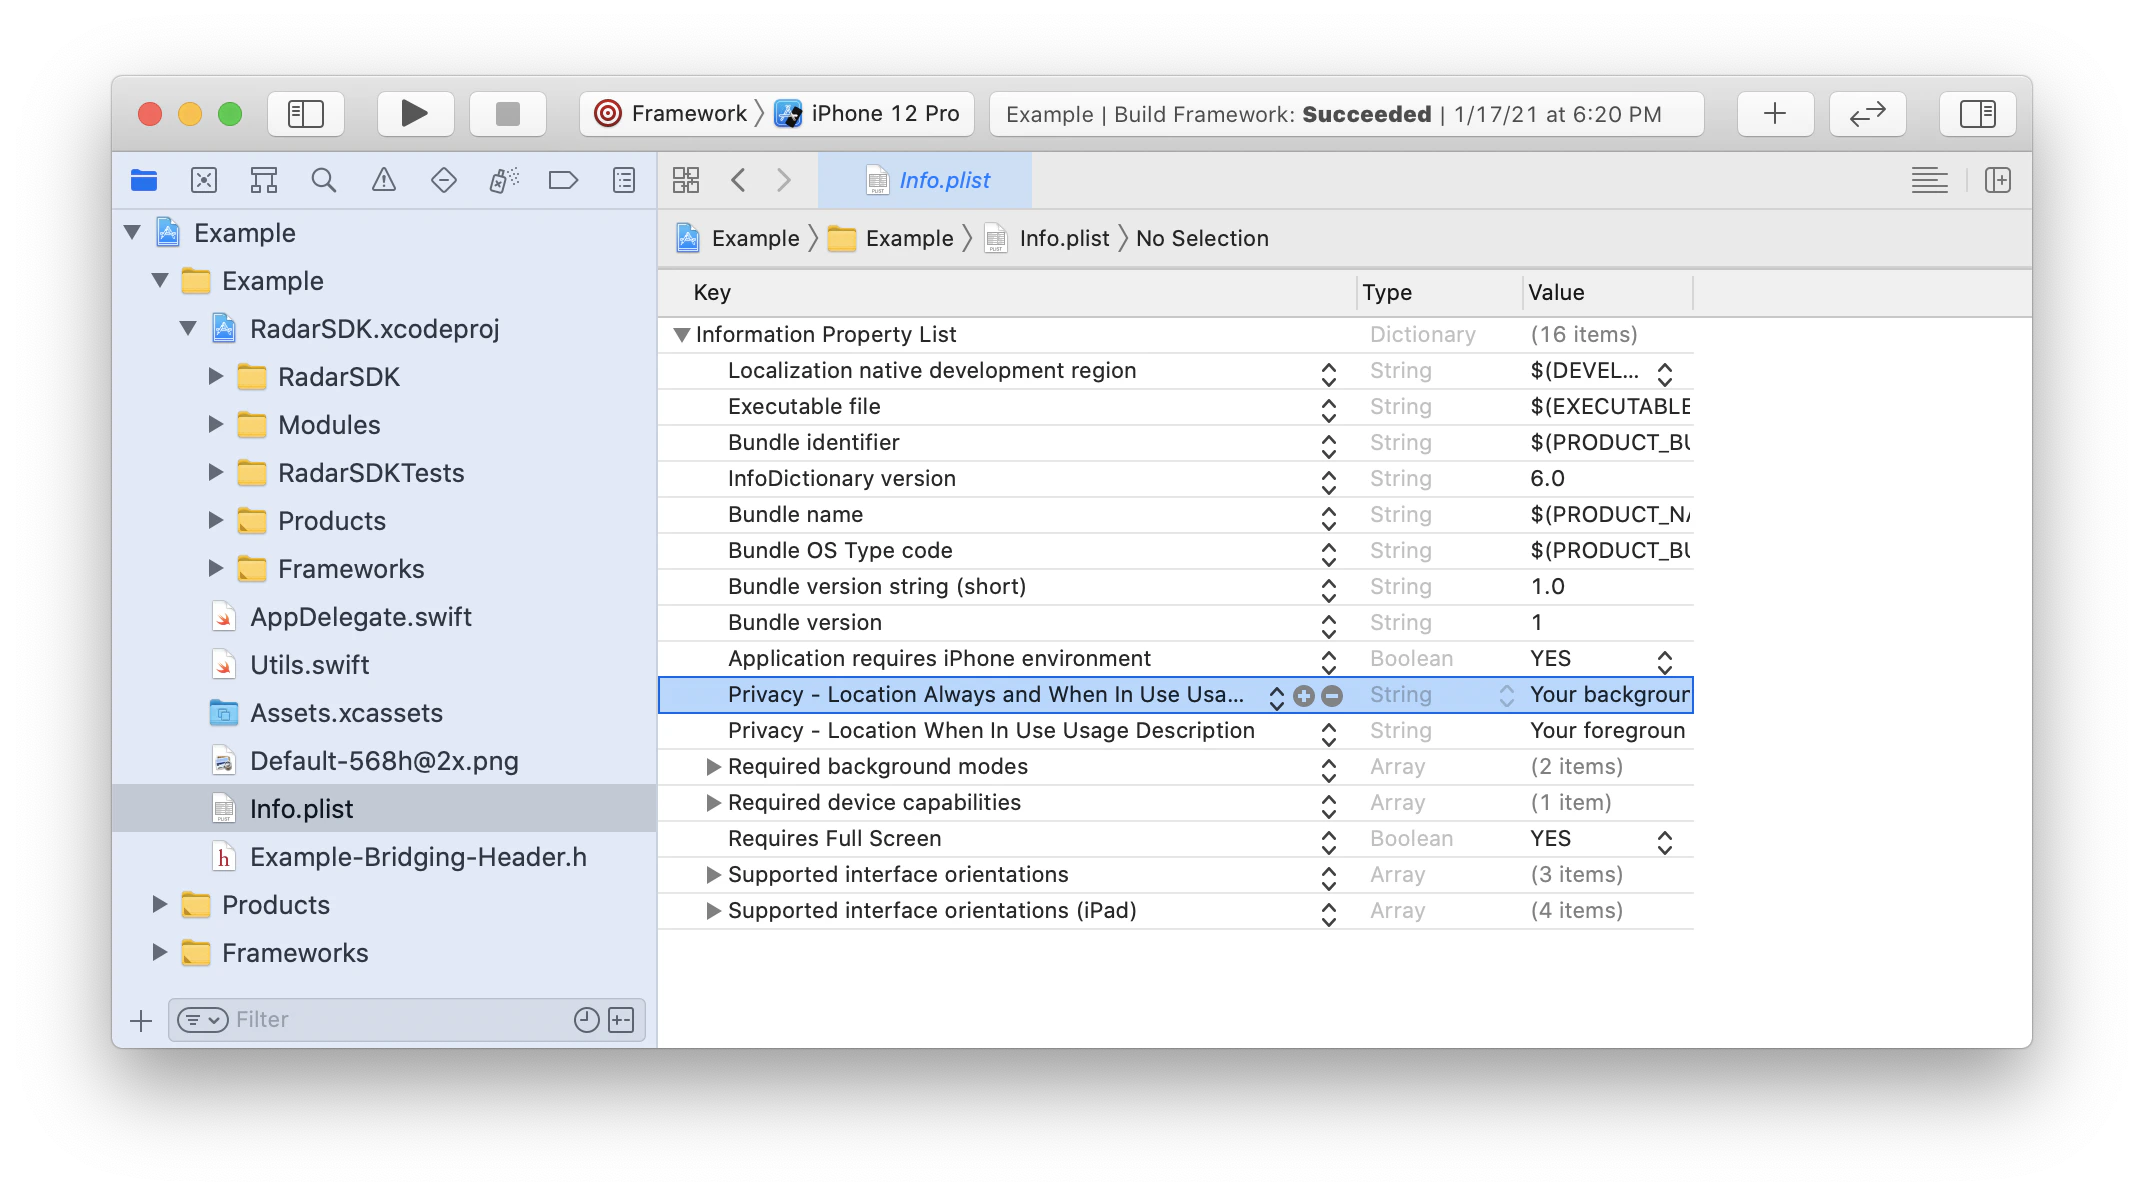
Before requesting permissions, you must add location usage strings to your `Info.plist` file. For foreground permissions, you must add a value for `NSLocationWhenInUseUsageDescription` (*Privacy - Location When In Use Usage Description*). For background permissions, you must add a value for `NSLocationAlwaysAndWhenInUseUsageDescription` (*Privacy - Location Always and When In Use Usage Description*). These strings are displayed in permissions prompts.
 To request foreground permissions, call `requestWhenInUseAuthorization`on a `CLLocationManager` instance. To request background permissions in the app, make sure the user has granted foreground permissions first, then call `requestAlwaysAuthorization` on a `CLLocationManager` instance.
To request foreground location permissions and then immediately request background location permissions:
```swift Swift theme={null}
import UIKit
import RadarSDK
import CoreLocation
@UIApplicationMain
class AppDelegate: UIResponder, UIApplicationDelegate, CLLocationManagerDelegate {
let locationManager = CLLocationManager()
func application(_ application: UIApplication, didFinishLaunchingWithOptions launchOptions: [UIApplication.LaunchOptionsKey: Any]?) -> Bool {
Radar.initialize(publishableKey: "prj_test_pk_...")
self.locationManager.delegate = self
self.requestLocationPermissions()
return true
}
func locationManager(_ manager: CLLocationManager, didChangeAuthorization status: CLAuthorizationStatus) {
self.requestLocationPermissions()
}
func requestLocationPermissions() {
let status = self.locationManager.authorizationStatus
if status == .notDetermined {
self.locationManager.requestWhenInUseAuthorization()
} else if status == .authorizedWhenInUse {
self.locationManager.requestAlwaysAuthorization()
}
}
}
```
```c Objective-C theme={null}
// AppDelegate.h
#import
#import
@interface AppDelegate : UIResponder
@end
// AppDelegate.m
#import "AppDelegate.h"
@import RadarSDK;
@interface AppDelegate ()
@property (strong, nonatomic) CLLocationManager *locationManager;
@end
@implementation AppDelegate
- (BOOL)application:(UIApplication *)application didFinishLaunchingWithOptions:(NSDictionary *)launchOptions {
[Radar initializeWithPublishableKey:@"prj_test_pk_..."];
self.locationManager = [CLLocationManager new];
self.locationManager.delegate = self;
[self requestLocationPermissions];
return YES;
}
- (void)locationManagerDidChangeAuthorization:(CLLocationManager *)manager {
[self requestPermissions];
}
- (void)requestPermissions {
CLAuthorizationStatus status = self.locationManager.authorizationStatus;
if (status == kCLAuthorizationStatusNotDetermined) {
[self.locationManager requestWhenInUseAuthorization];
} else if (status == kCLAuthorizationStatusAuthorizedAlways) {
[self.locationManager requestAlwaysAuthorization];
}
}
@end
```
Build and run the app to make sure permissions prompts are displayed!
Not seeing permissions prompts? First, make sure your location manager is in memory when you request permissions. Second, make sure you've added location usage strings to your `Info.plist` file. Finally, check your device settings to make sure you haven't already granted location permissions
### Background modes
If you are planning to use `RadarTrackingOptions.presetContinuous` or `RadarTrackingOptions.presetResponsive`, or if you are planning to [range beacons by UUID only](/geofencing/beacons#ranging-by-uuid-only), you must enable the *Location updates* and *Background fetch* background modes.
In your project settings, go to *Signing & Capabilities*, add *Background Modes*, and turn on *Location updates* and *Background fetch*.
Note that this requires additional justification during App Store review. Learn more [below](#submit-to-app-store).
To request foreground permissions, call `requestWhenInUseAuthorization`on a `CLLocationManager` instance. To request background permissions in the app, make sure the user has granted foreground permissions first, then call `requestAlwaysAuthorization` on a `CLLocationManager` instance.
To request foreground location permissions and then immediately request background location permissions:
```swift Swift theme={null}
import UIKit
import RadarSDK
import CoreLocation
@UIApplicationMain
class AppDelegate: UIResponder, UIApplicationDelegate, CLLocationManagerDelegate {
let locationManager = CLLocationManager()
func application(_ application: UIApplication, didFinishLaunchingWithOptions launchOptions: [UIApplication.LaunchOptionsKey: Any]?) -> Bool {
Radar.initialize(publishableKey: "prj_test_pk_...")
self.locationManager.delegate = self
self.requestLocationPermissions()
return true
}
func locationManager(_ manager: CLLocationManager, didChangeAuthorization status: CLAuthorizationStatus) {
self.requestLocationPermissions()
}
func requestLocationPermissions() {
let status = self.locationManager.authorizationStatus
if status == .notDetermined {
self.locationManager.requestWhenInUseAuthorization()
} else if status == .authorizedWhenInUse {
self.locationManager.requestAlwaysAuthorization()
}
}
}
```
```c Objective-C theme={null}
// AppDelegate.h
#import
#import
@interface AppDelegate : UIResponder
@end
// AppDelegate.m
#import "AppDelegate.h"
@import RadarSDK;
@interface AppDelegate ()
@property (strong, nonatomic) CLLocationManager *locationManager;
@end
@implementation AppDelegate
- (BOOL)application:(UIApplication *)application didFinishLaunchingWithOptions:(NSDictionary *)launchOptions {
[Radar initializeWithPublishableKey:@"prj_test_pk_..."];
self.locationManager = [CLLocationManager new];
self.locationManager.delegate = self;
[self requestLocationPermissions];
return YES;
}
- (void)locationManagerDidChangeAuthorization:(CLLocationManager *)manager {
[self requestPermissions];
}
- (void)requestPermissions {
CLAuthorizationStatus status = self.locationManager.authorizationStatus;
if (status == kCLAuthorizationStatusNotDetermined) {
[self.locationManager requestWhenInUseAuthorization];
} else if (status == kCLAuthorizationStatusAuthorizedAlways) {
[self.locationManager requestAlwaysAuthorization];
}
}
@end
```
Build and run the app to make sure permissions prompts are displayed!
Not seeing permissions prompts? First, make sure your location manager is in memory when you request permissions. Second, make sure you've added location usage strings to your `Info.plist` file. Finally, check your device settings to make sure you haven't already granted location permissions
### Background modes
If you are planning to use `RadarTrackingOptions.presetContinuous` or `RadarTrackingOptions.presetResponsive`, or if you are planning to [range beacons by UUID only](/geofencing/beacons#ranging-by-uuid-only), you must enable the *Location updates* and *Background fetch* background modes.
In your project settings, go to *Signing & Capabilities*, add *Background Modes*, and turn on *Location updates* and *Background fetch*.
Note that this requires additional justification during App Store review. Learn more [below](#submit-to-app-store).
 ## Foreground tracking
Once the user has granted foreground permissions, you can track the user's location in the foreground.
To track the user's location once in the foreground, call:
```swift Swift theme={null}
Radar.trackOnce { (status: RadarStatus, location: CLLocation?, events: [RadarEvent]?, user: RadarUser?) in
// do something with location, events, user
}
```
```c Objective-C theme={null}
[Radar trackOnceWithCompletionHandler:^(RadarStatus status, CLLocation *location, NSArray *events, RadarUser *user) {
// do something with location, events, user
}];
```
You may provide an optional `completionHandler` that receives the request status, the user's location, the events generated, if any, and the user. The request status can be:
* `.success`: success
* `.errorPublishableKey`: SDK not initialized
* `.errorPermissions`: location permissions not granted
* `.errorLocation`: location services error or timeout (10 seconds)
* `.errorNetwork`: network error or timeout (10 seconds)
* `.errorBadRequest`: bad request (missing or invalid params)
* `.errorUnauthorized`: unauthorized (invalid API key)
* `.errorPaymentRequired`: payment required (organization disabled or usage exceeded)
* `.errorForbidden`: forbidden (insufficient permissions)
* `.errorNotFound`: not found
* `.errorRateLimit`: too many requests ([rate limit](/api#track) exceeded)
* `.errorServer`: internal server error
* `.errorUnknown`: unknown error
Build and run the app, then find your user on the [**Users page**](https://dashboard.radar.com/geofencing/users)! To trigger an event, you'll need to [**create a geofence**](https://dashboard.radar.com/geofencing/geofences) if you haven't already. Not seeing your user on the Users page? Check `status` in the `completionHandler` to see what went wrong.
## Background tracking for geofencing
Once you have initialized the SDK and the user has authorized background permissions, you can start tracking the user's location in the background.
The SDK supports custom tracking options as well as three presets.
For geofencing, we recommend using `RadarTrackingOptions.presetResponsive`. This preset detects whether the device is stopped or moving. When moving, it tells the SDK to send location updates to the server every 2-3 minutes. When stopped, it tells the SDK to shut down to save battery. Once stopped, the device will need to move more than 100 meters to wake up and start moving again.
Assuming the user has authorized background permissions, background tracking will work even if the app has been backgrounded or killed, as iOS location services will wake up the app to deliver events.
Note that location updates may be delayed by if the device has connectivity issues, low battery, or wi-fi disabled.
Though we recommend using presets for most use cases, you can modify the presets. See the [**tracking options reference**](/sdk/tracking).
To start tracking for geofencing, call:
```swift Swift theme={null}
Radar.startTracking(trackingOptions: RadarTrackingOptions.presetResponsive)
```
```c Objective-C theme={null}
[Radar startTrackingWithOptions:RadarTrackingOptions.presetResponsive];
```
To determine whether tracking has been started, call:
```swift Swift theme={null}
Radar.isTracking()
```
```c Objective-C theme={null}
[Radar isTracking];
```
To stop tracking (e.g., when the user logs out), call:
```swift Swift theme={null}
Radar.stopTracking()
```
```c Objective-C theme={null}
[Radar stopTracking];
```
You only need to call these methods once, as these settings will be persisted across app sessions.
To test, go for a walk or a drive! Not seeing location updates or events? Remember that, once stopped, the device will need to move more than 100 meters to wake up and start moving again. Also, check your device settings to make sure you've granted background location permissions.
Don't forget! You can always find your user on the [**Users page**](https://dashboard.radar.com/geofencing/users) or events on the [**Events page**](https://dashboard.radar.com/geofencing/events). To trigger an event, you'll need to [**create a geofence**](https://dashboard.radar.com/geofencing/geofences) if you haven't already.
## Background tracking for trips
For trips, we recommend using `RadarTrackingOptions.presetContinuous`. This preset tells the SDK to send location updates to the server every 30 seconds, regardless of whether the device is moving.
By default, this preset shows the flashing blue status bar while tracking. If the flashing blue status bar is shown, only foreground permissions are required for tracking.
Tracking for the duration of a trip is started or updated by including tracking options in the `startTrip` call:
```swift Swift theme={null}
Radar.startTrip(options: tripOptions, trackingOptions: .presetContinuous) { (status: RadarStatus, trip: RadarTrip?, events: [RadarEvent]?) in
if status == .success {
// do something
} else {
// handle error
}
}
```
```c Objective-C theme={null}
[Radar startTripWithOptions:tripOptions trackingOptions:RadarTrackingOptions.presetContinuous
completionHandler:^(RadarStatus status, RadarTrip * _Nullable trip, NSArray * _Nullable events) {
if (status == RadarStatusSuccess) {
// do something
} else {
// handle error
}
}];
```
Not seeing the flashing blue status bar while tracking? Make sure you've added the Location updates background mode in your project settings.
If tracking was disabled before the trip started, it will stop after the trip ends. Otherwise, it will revert to the tracking options in use before the trip started:
```swift Swift theme={null}
// complete trip
Radar.completeTrip()
// cancel trip
Radar.cancelTrip()
```
```c Objective-C theme={null}
// complete trip
[Radar completeTrip];
// cancel trip
[Radar cancelTrip];
```
Learn more about starting, completing, and canceling trips in the [trip tracking documentation](/geofencing/trips).
Don't forget! You can always find your user on the [**Users page**](https://dashboard.radar.com/geofencing/users) or events on the [**Events page**](https://dashboard.radar.com/geofencing/events). To trigger an event, you'll need to [**create a geofence**](https://dashboard.radar.com/geofencing/geofences) or [**start a trip**](https://docs.radar.com/trip-tracking) if you haven't already. Also, check your device settings to make sure you've granted location permissions.
## Mock tracking for testing
Can't go for a walk or a drive? You can simulate a sequence of location updates. For example, to simulate a sequence of 10 location updates every 3 seconds by car from an origin to a destination, call:
```swift Swift theme={null}
Radar.mockTracking(
origin: CLLocation(latitude: 40.714708, longitude: -74.035807),
destination: CLLocation(latitude: 40.717410, longitude: -74.053334),
mode: .car,
steps: 10,
interval: 3) { (status: RadarStatus, location: CLLocation?, events: [RadarEvent]?, user: RadarUser?) in
// do something with location, events, user
}
```
```c Objective-C theme={null}
[Radar mockTrackingWithOrigin:origin
destination:destination
mode:RadarRouteModeCar
steps:steps
interval:1
completionHandler:^(RadarStatus status, CLLocation *location, NSArray *events, RadarUser *user) {
}];
```
Don't forget! You can always find your user on the [**Users page**](https://dashboard.radar.com/geofencing/users) or events on the [**Events page**](https://dashboard.radar.com/geofencing/events). To trigger an event, you'll need to [**create a geofence**](https://dashboard.radar.com/geofencing/geofences) if you haven't already.
## Location metadata
The SDK can also pass along information like motion activity detection, speed and heading via the location metadata field. Turn on `useMotion` in your `sdkConfiguration` to enable this feature.
To collect motionActivity, you must include a value for `Privacy - Motion Usage Description` in your `info.plist` and install the `RadarSDKMotion` companion module. Your app will request permission for Motion Activity data in the first track call.
Add the following to your `Podfile`:
```
pod 'RadarSDKMotion', '~> 3.21.5'
```
or add the `RadarSDKMotion` package product to your target via SPM.
## Listening for events with a delegate
To listen for events, location updates, and errors client-side, set a `RadarDelegate`. Set your `RadarDelegate` in a codepath that will be initialized and executed in the background. For example, make your `AppDelegate` implement `RadarDelegate`, not a `ViewController`. `AppDelegate` will be initialized in the background, whereas a `ViewController` may not be.
```swift Swift theme={null}
import UIKit
import RadarSDK
@UIApplicationMain
class AppDelegate: UIResponder, UIApplicationDelegate, RadarDelegate {
func application(_ application: UIApplication, didFinishLaunchingWithOptions launchOptions: [UIApplicationLaunchOptionsKey: Any]?) -> Bool {
Radar.initialize(publishableKey: "prj_test_pk_...")
Radar.setDelegate(self)
return true
}
func didReceiveEvents(_ events: [RadarEvent], user: RadarUser?) {
// do something with events, user
}
func didUpdateLocation(_ location: CLLocation, user: RadarUser) {
// do something with location, user
}
func didUpdateClientLocation(_ location: CLLocation, stopped: Bool, source: RadarLocationSource) {
// do something with location, stopped, source
}
func didFail(status: RadarStatus) {
// do something with status
}
func didLog(message: String) {
// print message for debug logs
}
}
```
```c Objective-C theme={null}
#import "AppDelegate.h"
@import RadarSDK;
@implementation AppDelegate
- (BOOL)application:(UIApplication *)application didFinishLaunchingWithOptions:(NSDictionary *)launchOptions {
[Radar initializeWithPublishableKey:@"prj_test_pk_..."];
[Radar setDelegate:self];
return YES;
}
- (void)didReceiveEvents:(NSArray *)events user:(RadarUser *)user {
// do something with events, user
}
- (void)didUpdateLocation:(CLLocation *)location user:(RadarUser *)user {
// do something with location, user
}
- (void)didUpdateClientLocation:(CLLocation *)location stopped:(BOOL)stopped source:(RadarLocationSource)source {
// do something with location, stopped, source
}
- (void)didFailWithStatus:(RadarStatus)status {
// do something with status
}
- (void)didLogMessage:(NSString *_Nonnull)message {
// print message for debug logs
}
@end
```
The `RadarDelegate` should be instantiated only once and set before tracking begins.
To listen for events server-side instead, add a [**webhook**](https://docs.radar.com/integrations/webhooks) or enable an [**integration**](https://docs.radar.com/integrations).
## Manual tracking
If you want to manage location services yourself, you can manually update the user's location instead by calling:
```swift Swift theme={null}
Radar.trackOnce(
location: location
) { (status: RadarStatus, location: CLLocation?, events: [RadarEvent]?, user: RadarUser?) in
// do something with location, events, user
}
```
```c Objective-C theme={null}
[Radar trackOnceWithLocation:location
completionHandler:^(RadarStatus status, CLLocation *location, NSArray *events, RadarUser *user) {
// do something with location, events, user
}];
```
where `location` is a `CLLocation` instance with a valid latitude, longitude, and horizontal accuracy.
## Identify user
The SDK automatically collects `installId` (a GUID generated on fresh install) and `deviceId` ([IDFV](https://developer.apple.com/documentation/uikit/uidevice/1620059-identifierforvendor)).
You can also assign a custom `userId`, also called *External ID* in the dashboard. To set a custom `userId`, call:
```swift Swift theme={null}
Radar.setUserId(userId)
```
```c Objective-C theme={null}
[Radar setUserId:userId];
```
where `userId` is a stable unique ID for the user.
Do not send any PII, like names, email addresses, or publicly available IDs, for `userId`. See [**privacy best practices**](https://docs.radar.com/faqs#what-are-privacy-best-practices-for-radar) for more information.
To set a dictionary of custom metadata for the user, call:
```swift Swift theme={null}
Radar.setMetadata(metadata)
```
```c Objective-C theme={null}
[Radar setUserId:userId];
```
where `metadata` is a dictionary with up to 16 keys and values of type string, boolean, or number.
Finally, to set an optional description for the user, displayed in the dashboard, call:
```swift Swift theme={null}
Radar.setDescription(description)
```
```c Objective-C theme={null}
[Radar setDescription:description];
```
You only need to call these methods once, as these settings will be persisted across app sessions.
Learn more about when Radar creates new user records [here](https://docs.radar.com/faqs#what-are-privacy-best-practices-for-radar).
## Debug logging
By default, only critical errors are logged to the console. To enable debug logging, call:
```swift Swift theme={null}
Radar.setLogLevel(RadarLogLevel.debug)
```
```c Objective-C theme={null}
[Radar setLogLevel:RadarLogLevelDebug];
```
To log app lifecycle events, call the respective Radar methods in the `AppDelegate` lifecycle methods:
```swift Swift theme={null}
import UIKit
import RadarSDK
@UIApplicationMain
class AppDelegate: UIResponder, UIApplicationDelegate, RadarDelegate {
func application(_ application: UIApplication, didFinishLaunchingWithOptions launchOptions: [UIApplicationLaunchOptionsKey: Any]?) -> Bool {
Radar.initialize(publishableKey: "prj_test_pk_...")
Radar.setDelegate(self)
return true
}
func applicationWillResignActive(_ application: UIApplication) {
// existing code
Radar.logResigningActive()
}
func applicationDidEnterBackground(_ application: UIApplication) {
// existing code
Radar.logBackgrounding()
}
func applicationWillTerminate(_ application: UIApplication) {
// existing code
Radar.logTermination()
}
}
```
```c Objective-C theme={null}
#import "AppDelegate.h"
@import RadarSDK;
@implementation AppDelegate
- (BOOL)application:(UIApplication *)application didFinishLaunchingWithOptions:(NSDictionary *)launchOptions {
[Radar initializeWithPublishableKey:@"prj_test_pk_..."];
[Radar setDelegate:self];
return YES;
}
- (void)applicationWillResignActive:(UIApplication *)application {
// existing code
[Radar logResigningActive];
}
- (void)applicationDidEnterBackground:(UIApplication *)application {
// existing code
[Radar logBackgrounding];
}
- (void)applicationWillTerminate:(UIApplication *)application {
// existing code
[Radar logTermination];
}
@end
```
Contact your customer success manager to enable logging app lifecycle events.
## Submit to App Store
Apple requires that you justify your use of background location. Add something materially similar to the following to the bottom of your App Store description: *This app uses background location to (insert use case here). Continued use of background location may decrease battery life.*
If you turned on the *Location updates* background mode, Apple requires additional justification in your App Store review notes. If using `RadarTrackingOptions.presetResponsive`, add something like: *This app uses the Radar SDK (*[*https://radar.com*](https://radar.com)*) to (insert use case here). The Radar SDK requires the background location mode to support polygon geofences and nearby place detection, which cannot be accomplished with region monitoring or visit monitoring.* Or, if using `RadarTrackingOptions.presetContinuous`, add something like *This app uses the Radar SDK (*[*https://radar.com*](https://radar.com)*) to (insert use case here). The Radar SDK requires the location background mode for live trip tracking and live ETAs.*
Learn more about this requirement in section 2.5.4 of the App Store Review Guidelines [here](https://developer.apple.com/app-store/review/guidelines/#software-requirements).
## Other APIs
The iOS SDK also exposes APIs for beacons, anonymous context, geocoding, search, and distance.
### Beacons
If the user has granted location permissions, you can range and monitor [beacons](/geofencing/beacons).
To range beacons in the foreground, call:
```swift Swift theme={null}
Radar.trackOnce(desiredAccuracy: .high, beacons: true) { (status: RadarStatus, location: CLLocation?, events: [RadarEvent]?, user: RadarUser?) in
// do something with user.beacons
}
```
```c Objective-C theme={null}
[Radar trackOnceWithDesiredAccuracy:RadarTrackingOptionsDesiredAccuracyHigh beacons:YES completionHandler:^(RadarStatus status, CLLocation *location, NSArray *events, RadarUser *user) {
// do something with user.beacons
}];
```
To monitor beacons in the background, update your tracking options:
```swift Swift theme={null}
let trackingOptions = RadarTrackingOptions.presetResponsive
trackingOptions.beacons = true
Radar.startTracking(trackingOptions: trackingOptions)
```
```c Objective-C theme={null}
RadarTrackingOptions *trackingOptions = RadarTrackingOptions.presetResponsive;
trackingOptions.beacons = YES;
[Radar startTrackingWithOptions:trackingOptions];
```
### Geocoding
With the [forward geocoding API](/api#forward-geocode), geocode an address, converting address to coordinates:
```swift Swift theme={null}
Radar.geocode(
address: "20 jay st brooklyn ny"
) { (status: RadarStatus, addresses: [RadarAddress]?) in
// do something with addresses
}
```
```c Objective-C theme={null}
[Radar geocodeAddress:@"20 jay st brooklyn ny"
completionHandler:^(RadarStatus status, NSArray *addresses) {
// do something with addresses
}];
```
With the [reverse geocoding API](/api#reverse-geocode), reverse geocode a location, converting coordinates to address:
```swift Swift theme={null}
Radar.reverseGeocode(
location: location
) { (status: RadarStatus, addresses: [RadarAddress]?) in
// do something with addresses
}
```
```c Objective-C theme={null}
[Radar reverseGeocodeLocation:location
completionHandler:^(RadarStatus status, NSArray *addresses) {
// do something with addresses
}];
```
With the [IP geocoding API](/api#ip-geocode), geocode the device's current IP address, converting IP address to city, state, and country:
```swift Swift theme={null}
Radar.ipGeocode { (status: RadarStatus, address: RadarAddress, proxy: Bool) in
// do something with address, proxy
}
```
```c Objective-C theme={null}
[Radar ipGeocodeWithCompletionHandler:^(RadarStatus status, RadarAddress *address, BOOL proxy) {
// do something with address, proxy
}];
```
### Search
With the [autocomplete API](/api#autocomplete), autocomplete partial addresses and place names, sorted by relevance:
```swift Swift theme={null}
Radar.autocomplete(
query: "brooklyn roasting",
near: location,
limit: 10
) { (status: RadarStatus, addresses: [RadarAddress]?) in
// do something with addresses
}
```
```c Objective-C theme={null}
[Radar autocompleteQuery:@"brooklyn roasting"
near:location
limit:10
completionHandler:^(RadarStatus status, NSArray *addresses) {
// do something with addresses
}];
```
With the [geofence search API](/api#search-geofences), search for geofences near a location, sorted by distance:
```swift Swift theme={null}
Radar.searchGeofences(
near: location,
radius: 1000, // meters
tags: ["store"],
metadata: nil,
limit: 10
) { (status: RadarStatus, location: CLLocation?, geofences: [RadarGeofence]?) in
// do something with geofences
}
```
```c Objective-C theme={null}
[Radar searchGeofencesNear:location
radius:1000 // meters
tags:@[@"store"]
metadata:nil
limit:100
completionHandler:^(RadarStatus status, CLLocation *location, NSArray *geofences) {
// do something with geofences
}];
```
With the [places search API](/api#search-places), search for places near a location, sorted by distance:
```swift Swift theme={null}
Radar.searchPlaces(
near: location,
radius: 1000, // meters
chains: ["starbucks"],
categories: nil,
groups: nil,
limit: 10
) { (status: RadarStatus, location: CLLocation?, places: [RadarPlace]?) in
// do something with places
}
```
```c Objective-C theme={null}
[Radar searchGeofencesNear:location
radius:1000 // meters
chains:@[@"starbucks"]
categories:nil
groups:nil
limit:100
completionHandler:^(RadarStatus status, CLLocation *location, NSArray *places) {
// do something with places
}];
```
With the [address validation API](/api##validate-an-address) (currently in beta), validate a structured address in the US or Canada:
```swift Swift theme={null}
Radar.validateAddress(
address: address
) { (status: RadarStatus, address: RadarAddress?, result: ValidationResult) in
// do something with validation result and address
}
```
```c Objective-C theme={null}
[Radar validateAddress:address
completionHandler:^(RadarStatus status, RadarAddress *address, ValidationResult result) {
// do something with validation result and address
}];
```
### Distance
With the [distance API](/api#distance), calculate the travel distance and duration between an origin and a destination:
```swift Swift theme={null}
Radar.getDistance(
origin: origin,
destination: destination,
modes: [.foot, .car],
units: .imperial
) { (status: RadarStatus, routes: RadarRoutes?) in
// do something with routes
}
```
```c Objective-C theme={null}
[Radar getDistanceFromOrigin:origin
destination:destination
modes:RadarRouteModeFoot | RadarRouteModeCar
units:RadarRouteUnitsImperial
completionHandler:^(RadarStatus status, RadarRoutes *routes) {
// do something with routes
}];
```
### Matrix
With the [matrix API](/api#matrix), calculate the travel distance and duration between multiple origins and destinations for up to 25 routes:
```swift Swift theme={null}
Radar.getMatrix(
origins: origins,
destinations: destinations,
mode: .car,
units: .imperial
) { (status: RadarStatus, matrix: RadarRouteMatrix?) in
// do something with matrix.routeBetween(originIndex:destinationIndex:)
}
```
```c Objective-C theme={null}
[Radar getMatrixFromOrigins:origin
destinations:destinations
mode:RadarRouteModeCar
units:RadarRouteUnitsImperial
completionHandler:^(RadarStatus status, RadarRouteMatrix *matrix) {
// do something with [matrix routeBetweenOriginIndex:destinationIndex:]
}];
```
### Conversions
With the [conversions API](/api#log-a-conversion), log a conversion, such as a purchase or signup, to analyze alongside your app's location activity:
```swift Swift theme={null}
Radar.logConversion(
name: name,
metadata: metadata,
) { (status: RadarStatus, event: RadarEvent?) in
// do something with the conversion event
}
// conversion with revenue
Radar.logConversion(
name: name,
revenue: revenue,
metadata: metadata,
) { (status: RadarStatus, event: RadarEvent?) in
// do something with the conversion event
}
```
```c Objective-C theme={null}
[Radar logConversionWithName:name
metadata:metadata
completionHandler:^(RadarStatus status, RadarEvent *event) {
// do something with the conversion event
}];
// conversion with revenue
[Radar logConversionWithName:name
revenue:revenue
metadata:metadata
completionHandler:^(RadarStatus status, RadarEvent *event) {
// do something with the conversion event
}];
```
Radar can associate `opened_app` events with a notification that was clicked on to open the app. To set this up automatically, set the relevant flag on the initialization options.
```swift Swift theme={null}
import UIKit
import RadarSDK
@UIApplicationMain
class AppDelegate: UIResponder, UIApplicationDelegate {
func application(_ application: UIApplication, didFinishLaunchingWithOptions launchOptions: [UIApplication.LaunchOptionsKey: Any]?) -> Bool {
let radarInitializeOptions = RadarInitializeOptions()
radarInitializeOptions.autoLogNotificationConversions = true
Radar.initialize(publishableKey: "prj_test_pk_...", options: radarInitializeOptions)
return true
}
}
```
```c Objective-C theme={null}
#import "AppDelegate.h"
@import RadarSDK;
@implementation AppDelegate
- (BOOL)application:(UIApplication *)application didFinishLaunchingWithOptions:(NSDictionary *)launchOptions {
RadarInitializeOptions *radarInitializeOptions = [[RadarInitializeOptions alloc] init];
radarInitializeOptions.autoLogNotificationConversions = YES;
[Radar initializeWithPublishableKey:@"prj_test_pk_..." options:radarInitializeOptions];
return YES;
}
@end
```
Alternatively, perform the manual setup:
```swift Swift theme={null}
func userNotificationCenter(_ center: UNUserNotificationCenter, didReceive response: UNNotificationResponse) async {
Radar.logConversion(response: response)
}
```
```c Objective-C theme={null}
- (void)userNotificationCenter:(UNUserNotificationCenter *)center didReceiveNotificationResponse:(UNNotificationResponse *)response withCompletionHandler:(void (^)(void))completionHandler {
[Radar logConversionWithNotificationResponse:response];
completionHandler();
}
```
### User tags
With the [user tag API](/campaigns#advanced-targeting-options), you can configure [campaigns](/campaigns) to only target users with the corresponding tags:
```swift Swift theme={null}
Radar.addTags(["tag1", "tag2"])
Radar.removeTags(["tag1", "tag2"])
Radar.setTags(["tag1", "tag2"])
Radar.getTags()
```
```objc Objective-C theme={null}
[Radar addTags:@[@"tag1", @"tag2"]];
[Radar removeTags:@[@"tag1", @"tag2"]];
[Radar setTags:@[@"tag1", @"tag2"]];
[Radar getTags];
```
## Foreground tracking
Once the user has granted foreground permissions, you can track the user's location in the foreground.
To track the user's location once in the foreground, call:
```swift Swift theme={null}
Radar.trackOnce { (status: RadarStatus, location: CLLocation?, events: [RadarEvent]?, user: RadarUser?) in
// do something with location, events, user
}
```
```c Objective-C theme={null}
[Radar trackOnceWithCompletionHandler:^(RadarStatus status, CLLocation *location, NSArray *events, RadarUser *user) {
// do something with location, events, user
}];
```
You may provide an optional `completionHandler` that receives the request status, the user's location, the events generated, if any, and the user. The request status can be:
* `.success`: success
* `.errorPublishableKey`: SDK not initialized
* `.errorPermissions`: location permissions not granted
* `.errorLocation`: location services error or timeout (10 seconds)
* `.errorNetwork`: network error or timeout (10 seconds)
* `.errorBadRequest`: bad request (missing or invalid params)
* `.errorUnauthorized`: unauthorized (invalid API key)
* `.errorPaymentRequired`: payment required (organization disabled or usage exceeded)
* `.errorForbidden`: forbidden (insufficient permissions)
* `.errorNotFound`: not found
* `.errorRateLimit`: too many requests ([rate limit](/api#track) exceeded)
* `.errorServer`: internal server error
* `.errorUnknown`: unknown error
Build and run the app, then find your user on the [**Users page**](https://dashboard.radar.com/geofencing/users)! To trigger an event, you'll need to [**create a geofence**](https://dashboard.radar.com/geofencing/geofences) if you haven't already. Not seeing your user on the Users page? Check `status` in the `completionHandler` to see what went wrong.
## Background tracking for geofencing
Once you have initialized the SDK and the user has authorized background permissions, you can start tracking the user's location in the background.
The SDK supports custom tracking options as well as three presets.
For geofencing, we recommend using `RadarTrackingOptions.presetResponsive`. This preset detects whether the device is stopped or moving. When moving, it tells the SDK to send location updates to the server every 2-3 minutes. When stopped, it tells the SDK to shut down to save battery. Once stopped, the device will need to move more than 100 meters to wake up and start moving again.
Assuming the user has authorized background permissions, background tracking will work even if the app has been backgrounded or killed, as iOS location services will wake up the app to deliver events.
Note that location updates may be delayed by if the device has connectivity issues, low battery, or wi-fi disabled.
Though we recommend using presets for most use cases, you can modify the presets. See the [**tracking options reference**](/sdk/tracking).
To start tracking for geofencing, call:
```swift Swift theme={null}
Radar.startTracking(trackingOptions: RadarTrackingOptions.presetResponsive)
```
```c Objective-C theme={null}
[Radar startTrackingWithOptions:RadarTrackingOptions.presetResponsive];
```
To determine whether tracking has been started, call:
```swift Swift theme={null}
Radar.isTracking()
```
```c Objective-C theme={null}
[Radar isTracking];
```
To stop tracking (e.g., when the user logs out), call:
```swift Swift theme={null}
Radar.stopTracking()
```
```c Objective-C theme={null}
[Radar stopTracking];
```
You only need to call these methods once, as these settings will be persisted across app sessions.
To test, go for a walk or a drive! Not seeing location updates or events? Remember that, once stopped, the device will need to move more than 100 meters to wake up and start moving again. Also, check your device settings to make sure you've granted background location permissions.
Don't forget! You can always find your user on the [**Users page**](https://dashboard.radar.com/geofencing/users) or events on the [**Events page**](https://dashboard.radar.com/geofencing/events). To trigger an event, you'll need to [**create a geofence**](https://dashboard.radar.com/geofencing/geofences) if you haven't already.
## Background tracking for trips
For trips, we recommend using `RadarTrackingOptions.presetContinuous`. This preset tells the SDK to send location updates to the server every 30 seconds, regardless of whether the device is moving.
By default, this preset shows the flashing blue status bar while tracking. If the flashing blue status bar is shown, only foreground permissions are required for tracking.
Tracking for the duration of a trip is started or updated by including tracking options in the `startTrip` call:
```swift Swift theme={null}
Radar.startTrip(options: tripOptions, trackingOptions: .presetContinuous) { (status: RadarStatus, trip: RadarTrip?, events: [RadarEvent]?) in
if status == .success {
// do something
} else {
// handle error
}
}
```
```c Objective-C theme={null}
[Radar startTripWithOptions:tripOptions trackingOptions:RadarTrackingOptions.presetContinuous
completionHandler:^(RadarStatus status, RadarTrip * _Nullable trip, NSArray * _Nullable events) {
if (status == RadarStatusSuccess) {
// do something
} else {
// handle error
}
}];
```
Not seeing the flashing blue status bar while tracking? Make sure you've added the Location updates background mode in your project settings.
If tracking was disabled before the trip started, it will stop after the trip ends. Otherwise, it will revert to the tracking options in use before the trip started:
```swift Swift theme={null}
// complete trip
Radar.completeTrip()
// cancel trip
Radar.cancelTrip()
```
```c Objective-C theme={null}
// complete trip
[Radar completeTrip];
// cancel trip
[Radar cancelTrip];
```
Learn more about starting, completing, and canceling trips in the [trip tracking documentation](/geofencing/trips).
Don't forget! You can always find your user on the [**Users page**](https://dashboard.radar.com/geofencing/users) or events on the [**Events page**](https://dashboard.radar.com/geofencing/events). To trigger an event, you'll need to [**create a geofence**](https://dashboard.radar.com/geofencing/geofences) or [**start a trip**](https://docs.radar.com/trip-tracking) if you haven't already. Also, check your device settings to make sure you've granted location permissions.
## Mock tracking for testing
Can't go for a walk or a drive? You can simulate a sequence of location updates. For example, to simulate a sequence of 10 location updates every 3 seconds by car from an origin to a destination, call:
```swift Swift theme={null}
Radar.mockTracking(
origin: CLLocation(latitude: 40.714708, longitude: -74.035807),
destination: CLLocation(latitude: 40.717410, longitude: -74.053334),
mode: .car,
steps: 10,
interval: 3) { (status: RadarStatus, location: CLLocation?, events: [RadarEvent]?, user: RadarUser?) in
// do something with location, events, user
}
```
```c Objective-C theme={null}
[Radar mockTrackingWithOrigin:origin
destination:destination
mode:RadarRouteModeCar
steps:steps
interval:1
completionHandler:^(RadarStatus status, CLLocation *location, NSArray *events, RadarUser *user) {
}];
```
Don't forget! You can always find your user on the [**Users page**](https://dashboard.radar.com/geofencing/users) or events on the [**Events page**](https://dashboard.radar.com/geofencing/events). To trigger an event, you'll need to [**create a geofence**](https://dashboard.radar.com/geofencing/geofences) if you haven't already.
## Location metadata
The SDK can also pass along information like motion activity detection, speed and heading via the location metadata field. Turn on `useMotion` in your `sdkConfiguration` to enable this feature.
To collect motionActivity, you must include a value for `Privacy - Motion Usage Description` in your `info.plist` and install the `RadarSDKMotion` companion module. Your app will request permission for Motion Activity data in the first track call.
Add the following to your `Podfile`:
```
pod 'RadarSDKMotion', '~> 3.21.5'
```
or add the `RadarSDKMotion` package product to your target via SPM.
## Listening for events with a delegate
To listen for events, location updates, and errors client-side, set a `RadarDelegate`. Set your `RadarDelegate` in a codepath that will be initialized and executed in the background. For example, make your `AppDelegate` implement `RadarDelegate`, not a `ViewController`. `AppDelegate` will be initialized in the background, whereas a `ViewController` may not be.
```swift Swift theme={null}
import UIKit
import RadarSDK
@UIApplicationMain
class AppDelegate: UIResponder, UIApplicationDelegate, RadarDelegate {
func application(_ application: UIApplication, didFinishLaunchingWithOptions launchOptions: [UIApplicationLaunchOptionsKey: Any]?) -> Bool {
Radar.initialize(publishableKey: "prj_test_pk_...")
Radar.setDelegate(self)
return true
}
func didReceiveEvents(_ events: [RadarEvent], user: RadarUser?) {
// do something with events, user
}
func didUpdateLocation(_ location: CLLocation, user: RadarUser) {
// do something with location, user
}
func didUpdateClientLocation(_ location: CLLocation, stopped: Bool, source: RadarLocationSource) {
// do something with location, stopped, source
}
func didFail(status: RadarStatus) {
// do something with status
}
func didLog(message: String) {
// print message for debug logs
}
}
```
```c Objective-C theme={null}
#import "AppDelegate.h"
@import RadarSDK;
@implementation AppDelegate
- (BOOL)application:(UIApplication *)application didFinishLaunchingWithOptions:(NSDictionary *)launchOptions {
[Radar initializeWithPublishableKey:@"prj_test_pk_..."];
[Radar setDelegate:self];
return YES;
}
- (void)didReceiveEvents:(NSArray *)events user:(RadarUser *)user {
// do something with events, user
}
- (void)didUpdateLocation:(CLLocation *)location user:(RadarUser *)user {
// do something with location, user
}
- (void)didUpdateClientLocation:(CLLocation *)location stopped:(BOOL)stopped source:(RadarLocationSource)source {
// do something with location, stopped, source
}
- (void)didFailWithStatus:(RadarStatus)status {
// do something with status
}
- (void)didLogMessage:(NSString *_Nonnull)message {
// print message for debug logs
}
@end
```
The `RadarDelegate` should be instantiated only once and set before tracking begins.
To listen for events server-side instead, add a [**webhook**](https://docs.radar.com/integrations/webhooks) or enable an [**integration**](https://docs.radar.com/integrations).
## Manual tracking
If you want to manage location services yourself, you can manually update the user's location instead by calling:
```swift Swift theme={null}
Radar.trackOnce(
location: location
) { (status: RadarStatus, location: CLLocation?, events: [RadarEvent]?, user: RadarUser?) in
// do something with location, events, user
}
```
```c Objective-C theme={null}
[Radar trackOnceWithLocation:location
completionHandler:^(RadarStatus status, CLLocation *location, NSArray *events, RadarUser *user) {
// do something with location, events, user
}];
```
where `location` is a `CLLocation` instance with a valid latitude, longitude, and horizontal accuracy.
## Identify user
The SDK automatically collects `installId` (a GUID generated on fresh install) and `deviceId` ([IDFV](https://developer.apple.com/documentation/uikit/uidevice/1620059-identifierforvendor)).
You can also assign a custom `userId`, also called *External ID* in the dashboard. To set a custom `userId`, call:
```swift Swift theme={null}
Radar.setUserId(userId)
```
```c Objective-C theme={null}
[Radar setUserId:userId];
```
where `userId` is a stable unique ID for the user.
Do not send any PII, like names, email addresses, or publicly available IDs, for `userId`. See [**privacy best practices**](https://docs.radar.com/faqs#what-are-privacy-best-practices-for-radar) for more information.
To set a dictionary of custom metadata for the user, call:
```swift Swift theme={null}
Radar.setMetadata(metadata)
```
```c Objective-C theme={null}
[Radar setUserId:userId];
```
where `metadata` is a dictionary with up to 16 keys and values of type string, boolean, or number.
Finally, to set an optional description for the user, displayed in the dashboard, call:
```swift Swift theme={null}
Radar.setDescription(description)
```
```c Objective-C theme={null}
[Radar setDescription:description];
```
You only need to call these methods once, as these settings will be persisted across app sessions.
Learn more about when Radar creates new user records [here](https://docs.radar.com/faqs#what-are-privacy-best-practices-for-radar).
## Debug logging
By default, only critical errors are logged to the console. To enable debug logging, call:
```swift Swift theme={null}
Radar.setLogLevel(RadarLogLevel.debug)
```
```c Objective-C theme={null}
[Radar setLogLevel:RadarLogLevelDebug];
```
To log app lifecycle events, call the respective Radar methods in the `AppDelegate` lifecycle methods:
```swift Swift theme={null}
import UIKit
import RadarSDK
@UIApplicationMain
class AppDelegate: UIResponder, UIApplicationDelegate, RadarDelegate {
func application(_ application: UIApplication, didFinishLaunchingWithOptions launchOptions: [UIApplicationLaunchOptionsKey: Any]?) -> Bool {
Radar.initialize(publishableKey: "prj_test_pk_...")
Radar.setDelegate(self)
return true
}
func applicationWillResignActive(_ application: UIApplication) {
// existing code
Radar.logResigningActive()
}
func applicationDidEnterBackground(_ application: UIApplication) {
// existing code
Radar.logBackgrounding()
}
func applicationWillTerminate(_ application: UIApplication) {
// existing code
Radar.logTermination()
}
}
```
```c Objective-C theme={null}
#import "AppDelegate.h"
@import RadarSDK;
@implementation AppDelegate
- (BOOL)application:(UIApplication *)application didFinishLaunchingWithOptions:(NSDictionary *)launchOptions {
[Radar initializeWithPublishableKey:@"prj_test_pk_..."];
[Radar setDelegate:self];
return YES;
}
- (void)applicationWillResignActive:(UIApplication *)application {
// existing code
[Radar logResigningActive];
}
- (void)applicationDidEnterBackground:(UIApplication *)application {
// existing code
[Radar logBackgrounding];
}
- (void)applicationWillTerminate:(UIApplication *)application {
// existing code
[Radar logTermination];
}
@end
```
Contact your customer success manager to enable logging app lifecycle events.
## Submit to App Store
Apple requires that you justify your use of background location. Add something materially similar to the following to the bottom of your App Store description: *This app uses background location to (insert use case here). Continued use of background location may decrease battery life.*
If you turned on the *Location updates* background mode, Apple requires additional justification in your App Store review notes. If using `RadarTrackingOptions.presetResponsive`, add something like: *This app uses the Radar SDK (*[*https://radar.com*](https://radar.com)*) to (insert use case here). The Radar SDK requires the background location mode to support polygon geofences and nearby place detection, which cannot be accomplished with region monitoring or visit monitoring.* Or, if using `RadarTrackingOptions.presetContinuous`, add something like *This app uses the Radar SDK (*[*https://radar.com*](https://radar.com)*) to (insert use case here). The Radar SDK requires the location background mode for live trip tracking and live ETAs.*
Learn more about this requirement in section 2.5.4 of the App Store Review Guidelines [here](https://developer.apple.com/app-store/review/guidelines/#software-requirements).
## Other APIs
The iOS SDK also exposes APIs for beacons, anonymous context, geocoding, search, and distance.
### Beacons
If the user has granted location permissions, you can range and monitor [beacons](/geofencing/beacons).
To range beacons in the foreground, call:
```swift Swift theme={null}
Radar.trackOnce(desiredAccuracy: .high, beacons: true) { (status: RadarStatus, location: CLLocation?, events: [RadarEvent]?, user: RadarUser?) in
// do something with user.beacons
}
```
```c Objective-C theme={null}
[Radar trackOnceWithDesiredAccuracy:RadarTrackingOptionsDesiredAccuracyHigh beacons:YES completionHandler:^(RadarStatus status, CLLocation *location, NSArray *events, RadarUser *user) {
// do something with user.beacons
}];
```
To monitor beacons in the background, update your tracking options:
```swift Swift theme={null}
let trackingOptions = RadarTrackingOptions.presetResponsive
trackingOptions.beacons = true
Radar.startTracking(trackingOptions: trackingOptions)
```
```c Objective-C theme={null}
RadarTrackingOptions *trackingOptions = RadarTrackingOptions.presetResponsive;
trackingOptions.beacons = YES;
[Radar startTrackingWithOptions:trackingOptions];
```
### Geocoding
With the [forward geocoding API](/api#forward-geocode), geocode an address, converting address to coordinates:
```swift Swift theme={null}
Radar.geocode(
address: "20 jay st brooklyn ny"
) { (status: RadarStatus, addresses: [RadarAddress]?) in
// do something with addresses
}
```
```c Objective-C theme={null}
[Radar geocodeAddress:@"20 jay st brooklyn ny"
completionHandler:^(RadarStatus status, NSArray *addresses) {
// do something with addresses
}];
```
With the [reverse geocoding API](/api#reverse-geocode), reverse geocode a location, converting coordinates to address:
```swift Swift theme={null}
Radar.reverseGeocode(
location: location
) { (status: RadarStatus, addresses: [RadarAddress]?) in
// do something with addresses
}
```
```c Objective-C theme={null}
[Radar reverseGeocodeLocation:location
completionHandler:^(RadarStatus status, NSArray *addresses) {
// do something with addresses
}];
```
With the [IP geocoding API](/api#ip-geocode), geocode the device's current IP address, converting IP address to city, state, and country:
```swift Swift theme={null}
Radar.ipGeocode { (status: RadarStatus, address: RadarAddress, proxy: Bool) in
// do something with address, proxy
}
```
```c Objective-C theme={null}
[Radar ipGeocodeWithCompletionHandler:^(RadarStatus status, RadarAddress *address, BOOL proxy) {
// do something with address, proxy
}];
```
### Search
With the [autocomplete API](/api#autocomplete), autocomplete partial addresses and place names, sorted by relevance:
```swift Swift theme={null}
Radar.autocomplete(
query: "brooklyn roasting",
near: location,
limit: 10
) { (status: RadarStatus, addresses: [RadarAddress]?) in
// do something with addresses
}
```
```c Objective-C theme={null}
[Radar autocompleteQuery:@"brooklyn roasting"
near:location
limit:10
completionHandler:^(RadarStatus status, NSArray *addresses) {
// do something with addresses
}];
```
With the [geofence search API](/api#search-geofences), search for geofences near a location, sorted by distance:
```swift Swift theme={null}
Radar.searchGeofences(
near: location,
radius: 1000, // meters
tags: ["store"],
metadata: nil,
limit: 10
) { (status: RadarStatus, location: CLLocation?, geofences: [RadarGeofence]?) in
// do something with geofences
}
```
```c Objective-C theme={null}
[Radar searchGeofencesNear:location
radius:1000 // meters
tags:@[@"store"]
metadata:nil
limit:100
completionHandler:^(RadarStatus status, CLLocation *location, NSArray *geofences) {
// do something with geofences
}];
```
With the [places search API](/api#search-places), search for places near a location, sorted by distance:
```swift Swift theme={null}
Radar.searchPlaces(
near: location,
radius: 1000, // meters
chains: ["starbucks"],
categories: nil,
groups: nil,
limit: 10
) { (status: RadarStatus, location: CLLocation?, places: [RadarPlace]?) in
// do something with places
}
```
```c Objective-C theme={null}
[Radar searchGeofencesNear:location
radius:1000 // meters
chains:@[@"starbucks"]
categories:nil
groups:nil
limit:100
completionHandler:^(RadarStatus status, CLLocation *location, NSArray *places) {
// do something with places
}];
```
With the [address validation API](/api##validate-an-address) (currently in beta), validate a structured address in the US or Canada:
```swift Swift theme={null}
Radar.validateAddress(
address: address
) { (status: RadarStatus, address: RadarAddress?, result: ValidationResult) in
// do something with validation result and address
}
```
```c Objective-C theme={null}
[Radar validateAddress:address
completionHandler:^(RadarStatus status, RadarAddress *address, ValidationResult result) {
// do something with validation result and address
}];
```
### Distance
With the [distance API](/api#distance), calculate the travel distance and duration between an origin and a destination:
```swift Swift theme={null}
Radar.getDistance(
origin: origin,
destination: destination,
modes: [.foot, .car],
units: .imperial
) { (status: RadarStatus, routes: RadarRoutes?) in
// do something with routes
}
```
```c Objective-C theme={null}
[Radar getDistanceFromOrigin:origin
destination:destination
modes:RadarRouteModeFoot | RadarRouteModeCar
units:RadarRouteUnitsImperial
completionHandler:^(RadarStatus status, RadarRoutes *routes) {
// do something with routes
}];
```
### Matrix
With the [matrix API](/api#matrix), calculate the travel distance and duration between multiple origins and destinations for up to 25 routes:
```swift Swift theme={null}
Radar.getMatrix(
origins: origins,
destinations: destinations,
mode: .car,
units: .imperial
) { (status: RadarStatus, matrix: RadarRouteMatrix?) in
// do something with matrix.routeBetween(originIndex:destinationIndex:)
}
```
```c Objective-C theme={null}
[Radar getMatrixFromOrigins:origin
destinations:destinations
mode:RadarRouteModeCar
units:RadarRouteUnitsImperial
completionHandler:^(RadarStatus status, RadarRouteMatrix *matrix) {
// do something with [matrix routeBetweenOriginIndex:destinationIndex:]
}];
```
### Conversions
With the [conversions API](/api#log-a-conversion), log a conversion, such as a purchase or signup, to analyze alongside your app's location activity:
```swift Swift theme={null}
Radar.logConversion(
name: name,
metadata: metadata,
) { (status: RadarStatus, event: RadarEvent?) in
// do something with the conversion event
}
// conversion with revenue
Radar.logConversion(
name: name,
revenue: revenue,
metadata: metadata,
) { (status: RadarStatus, event: RadarEvent?) in
// do something with the conversion event
}
```
```c Objective-C theme={null}
[Radar logConversionWithName:name
metadata:metadata
completionHandler:^(RadarStatus status, RadarEvent *event) {
// do something with the conversion event
}];
// conversion with revenue
[Radar logConversionWithName:name
revenue:revenue
metadata:metadata
completionHandler:^(RadarStatus status, RadarEvent *event) {
// do something with the conversion event
}];
```
Radar can associate `opened_app` events with a notification that was clicked on to open the app. To set this up automatically, set the relevant flag on the initialization options.
```swift Swift theme={null}
import UIKit
import RadarSDK
@UIApplicationMain
class AppDelegate: UIResponder, UIApplicationDelegate {
func application(_ application: UIApplication, didFinishLaunchingWithOptions launchOptions: [UIApplication.LaunchOptionsKey: Any]?) -> Bool {
let radarInitializeOptions = RadarInitializeOptions()
radarInitializeOptions.autoLogNotificationConversions = true
Radar.initialize(publishableKey: "prj_test_pk_...", options: radarInitializeOptions)
return true
}
}
```
```c Objective-C theme={null}
#import "AppDelegate.h"
@import RadarSDK;
@implementation AppDelegate
- (BOOL)application:(UIApplication *)application didFinishLaunchingWithOptions:(NSDictionary *)launchOptions {
RadarInitializeOptions *radarInitializeOptions = [[RadarInitializeOptions alloc] init];
radarInitializeOptions.autoLogNotificationConversions = YES;
[Radar initializeWithPublishableKey:@"prj_test_pk_..." options:radarInitializeOptions];
return YES;
}
@end
```
Alternatively, perform the manual setup:
```swift Swift theme={null}
func userNotificationCenter(_ center: UNUserNotificationCenter, didReceive response: UNNotificationResponse) async {
Radar.logConversion(response: response)
}
```
```c Objective-C theme={null}
- (void)userNotificationCenter:(UNUserNotificationCenter *)center didReceiveNotificationResponse:(UNNotificationResponse *)response withCompletionHandler:(void (^)(void))completionHandler {
[Radar logConversionWithNotificationResponse:response];
completionHandler();
}
```
### User tags
With the [user tag API](/campaigns#advanced-targeting-options), you can configure [campaigns](/campaigns) to only target users with the corresponding tags:
```swift Swift theme={null}
Radar.addTags(["tag1", "tag2"])
Radar.removeTags(["tag1", "tag2"])
Radar.setTags(["tag1", "tag2"])
Radar.getTags()
```
```objc Objective-C theme={null}
[Radar addTags:@[@"tag1", @"tag2"]];
[Radar removeTags:@[@"tag1", @"tag2"]];
[Radar setTags:@[@"tag1", @"tag2"]];
[Radar getTags];
```